Getting Started with Image Generation
DatBot’s image generation system gives you access to cutting-edge AI models that can create stunning visuals from text descriptions. Whether you need professional product shots, artistic illustrations, or eye-catching social media content, our system makes it simple.
Two Powerful Modes
Generate Mode
Create new images from scratch using text prompts. Perfect for:
- Original artwork and illustrations
- Product mockups and concepts
- Social media content
- Marketing materials
- Creative exploration
Edit Mode
Transform existing images with AI-powered editing. Great for:
- Enhancing photo quality
- Removing backgrounds
- Upscaling low-resolution images
- Restoring old or damaged photos
- Applying artistic styles
Quality Options
Choose the right quality level for your needs:
Fast (Standard)
- Speed: 10-30 seconds
- Quality: Good for most uses
- Best for: Quick iterations, drafts, testing ideas
High Quality (HQ)
- Speed: 30-60 seconds
- Quality: Exceptional detail and coherence
- Best for: Final outputs, professional use
Ultra HQ
- Speed: 60-120 seconds
- Quality: Maximum possible quality
- Best for: Premium projects, large prints
Pro Tip
Start with Fast mode to test your prompts, then switch to HQ or Ultra HQ for final generation once you’re happy with the concept.
Aspect Ratios & Formats
Support for multiple formats depending on your needs:
Common Ratios
- Square (1:1) - Instagram posts, avatars
- Landscape (4:3) - Traditional photos
- Landscape (16:9) - YouTube thumbnails, presentations
- Portrait (3:4) - Book covers, posters
- Portrait (9:16) - Instagram Stories, TikTok
Special Formats (HQ/Ultra HQ only)
- Ultra-wide (21:9) - Cinematic banners
- Tall (9:21) - Mobile wallpapers
- Custom ratios for specific needs
Style Gallery
Our 40+ carefully curated styles help you achieve exactly the look you want:
Automatic & Practical
- Auto - AI selects the best style
- Icon - Clean app icons
- Logo - Professional branding
- Social Media - Optimized for engagement
- Product Shot - E-commerce ready
- Infographic - Data visualization
Artistic Mediums
- Photography - Realistic camera shots
- Watercolor - Soft, flowing art
- Oil Painting - Rich, textured artwork
- Sketch - Hand-drawn aesthetics
- Digital Art - Modern illustrations
Specialized Styles
- Anime - Japanese animation style
- Cyberpunk - Futuristic neon aesthetic
- Fantasy Art - Magical worlds
- Cinematic - Movie-quality shots
- Minimalist - Clean, simple designs
The Magic Prompt Feature
Not sure how to describe your vision? Our “Magic Prompt” button transforms simple ideas into detailed, optimized prompts:
- Type a basic idea: “cat in space”
- Click “Magic Prompt”
- Get an enhanced version: “A majestic tabby cat floating gracefully in the cosmic void, wearing a detailed astronaut suit with reflective visor, surrounded by vibrant nebulas and twinkling stars, photorealistic style with dramatic lighting”
The best part? We show you the enhanced prompt so you can learn and modify it further!
Step-by-Step Image Creation
Creating Your First Image
-
Navigate to Media
- Click the media icon in your left sidebar
- Select the “Images” tab
-
Enter Your Prompt
- Describe what you want to see
- Be specific about details, colors, and composition
- Example: “A cozy coffee shop interior with warm lighting”
-
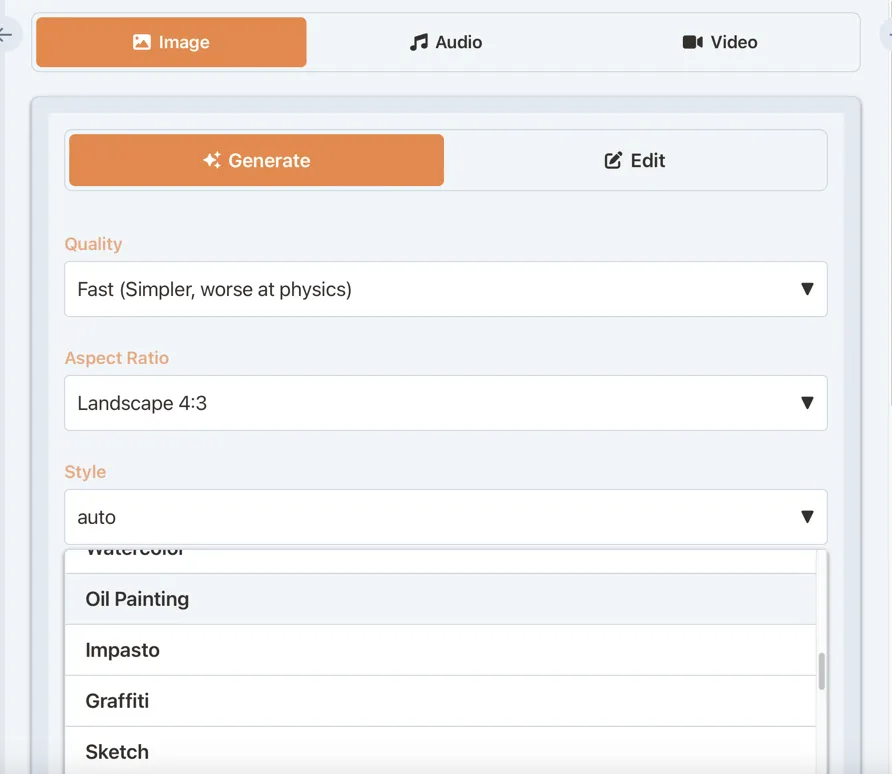
Choose Settings
- Select quality (start with Fast)
- Pick an aspect ratio
- Choose a style or use Auto
-
Enhance Your Prompt (Optional)
- Click “Magic Prompt” for AI assistance
- Review and adjust the enhanced version
-
Generate
- Select 1-4 images to generate
- Click “Generate”
- Watch your creation come to life!
Using Edit Mode
-
Switch to Edit Mode
- Toggle the mode selector to “Edit”
-
Select Your Image
- Choose from your media library
- Or upload a new image
-
Choose Edit Type
- Enhance: Improve overall quality
- Upscale: Increase resolution (2x-4x)
- Remove Background: Clean extraction
- Stylize: Apply artistic filters
- Restore: Fix old/damaged photos
-
Add Instructions (Optional)
- For “None” edit type, describe changes
- Be specific: “Make the sky more dramatic”
-
Process
- Edit mode uses HQ/Ultra HQ automatically
- Results maintain original dimensions
Best Practices & Pro Tips
Writing Effective Prompts
DO:
- Include specific details about lighting, mood, and composition
- Mention artistic style or reference (“in the style of…”)
- Describe colors, textures, and atmosphere
- Use the style selector before enhancing prompts
DON’T:
- Use contradictory descriptions
- Include too many unrelated elements
- Forget about aspect ratio considerations
Examples of Great Prompts
Product Photography: “Minimalist product shot of a sleek smartwatch on white marble surface, soft studio lighting, shallow depth of field, professional photography”
Character Art: “Fantasy warrior princess with flowing red hair, ornate golden armor, standing heroically on mountain peak at sunset, digital painting style”
Social Media: “Vibrant flat design illustration of remote work setup with laptop, coffee, and plants, cheerful color palette, perfect for Instagram post”
Managing Your Creations
Image History
- All generated images appear in your history
- Automatic thumbnail generation
- Status indicators for processing
- Batch indicators for multi-image sets
Actions Available
- Preview: Full-screen viewing
- Download: Single or batch downloads
- Save to Library: Permanent storage
- Reuse: Copy settings for variations
- Delete: Remove from history
Organization Tips
- Save favorites to your media library
- Use descriptive names when saving
- Create folders for different projects
- Download backups of important work
Credit Optimization
Make the most of your credits:
- Test with Fast mode - Lower credit usage
- Generate singles first - Test before batch generation
- Use appropriate quality - HQ isn’t always necessary
- Save successful prompts - Reuse what works
Common Issues & Solutions
”My images don’t match my vision”
- Use more descriptive prompts
- Try the Magic Prompt feature
- Experiment with different styles
- Generate multiple variations
”Text in images looks wrong”
- Switch to HQ or Ultra HQ mode
- Avoid requesting small text
- Consider using edit mode for text
”Anatomy issues in characters”
- Use HQ mode for better coherence
- Be specific about poses
- Try different styles (some handle anatomy better)
Advanced Techniques
Style Mixing
- Select a technical style (like “Isometric”)
- Enhance your prompt with that style
- Switch to an artistic style (like “Watercolor”)
- Generate for unique combinations!
Batch Workflows
- Generate 4 variations
- Save the best to library
- Use as reference for edits
- Create consistent series
Integration with Other Features
Combine with Text Generation
- Generate images for your blog posts
- Create visual aids for presentations
- Illustrate stories and narratives
Use in Workflows
- Create social media campaigns
- Design product catalogs
- Build visual content libraries
What’s Next?
Ready to create amazing images? Here’s your action plan:
- Start with simple prompts in Fast mode
- Experiment with different styles
- Use Magic Prompt to learn effective descriptions
- Save your favorites to build a library
- Try Edit mode for enhancements
You’re Ready!
Jump into the Media tab and start creating. Remember, the best way to learn is by experimenting. Have fun and let your creativity flow!
Related Resources
- Audio Generation Guide - Add voices to your visuals
- Video Generation Guide - Bring images to life
- Media Overview - Master the complete system
- Available Models - Explore all AI models